In this Arduino motor guide, you’ll learn how to drive and control the speed of a DC motor using an Arduino UNO and a TIP120 transistor. In this example, you’ll use a pushbutton to ramp up the motor speed and then slow it down, thanks to the power of Pulse Width Modulation (PWM).
Materials Needed:
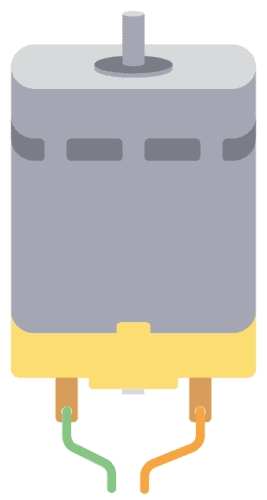
- Arduino
- DC Motor
- TIP120 Transistor
- 1N4001 Diode
- 9V Battery
- Pushbutton (Momentary Switch)
- 10-kilohm Resistor
- Breadboard and Jumper Wires
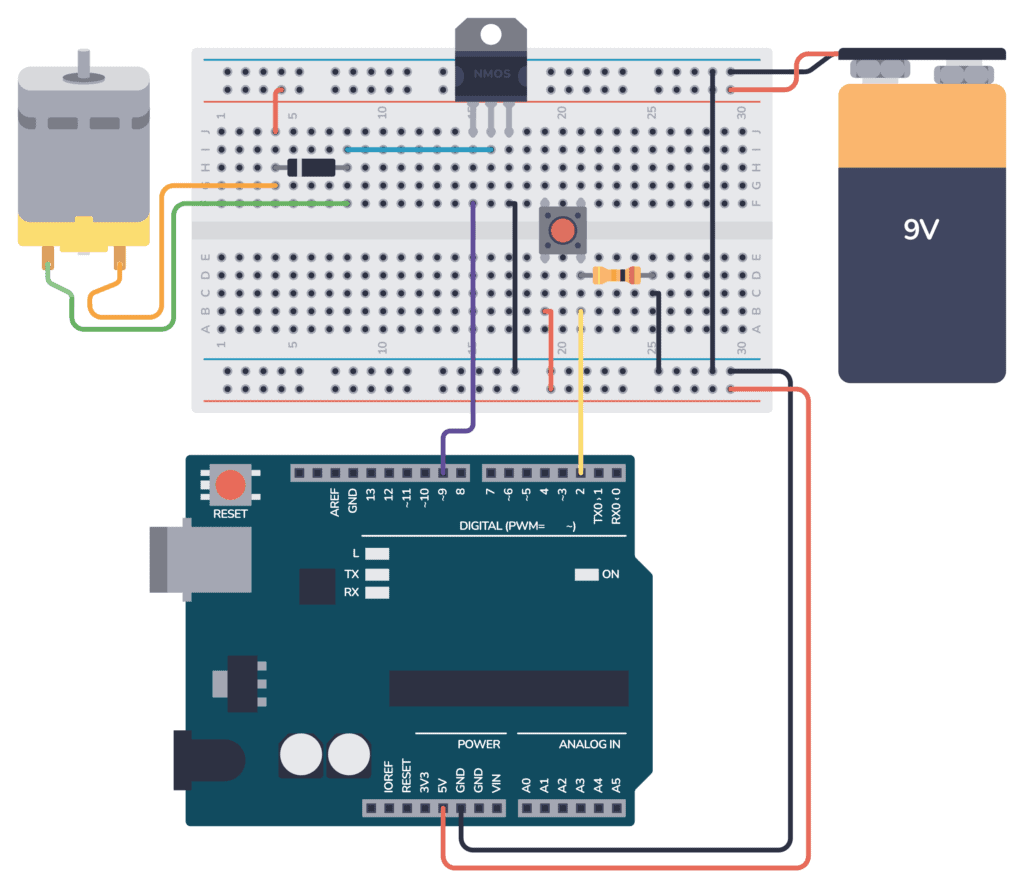
Arduino Motor Circuit
In the following circuit we’ve connected the transistor as a switch to control the DC motor to avoid pulling a lot of current out from the Arduino itself:
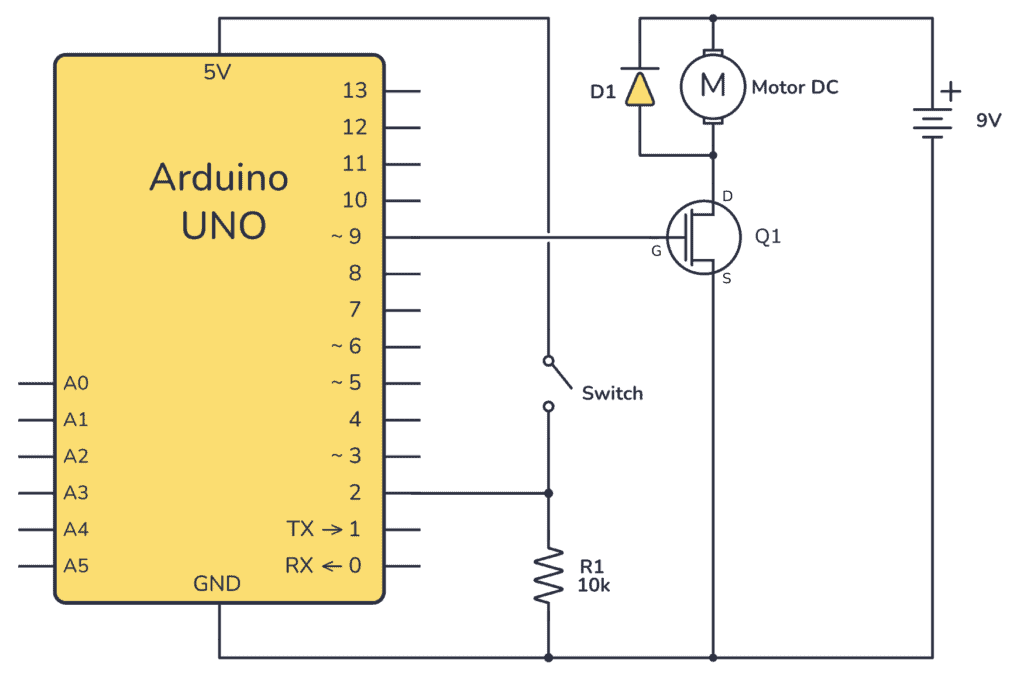
- Connect your momentary switch to 5V and GND through a 10-kilohm resistor, with the signal going to digital pin 2 on your Arduino.
- Attach the base of your TIP120 transistor to digital pin 9 on the Arduino, the emitter to the Arduino’s ground, and the collector to one lead of your DC motor.
- Place a 1N4001 diode across the motor’s leads, ensuring that the striped side is connected to the 9V positive lead.
- Power the motor with a 9V battery, connecting the ground to the Arduino’s ground and the positive to the motor.
(Refer to the schematic and breadboard illustrations provided for visual assistance.)
Arduino DC Motor Code Example
Below is the example code to control your motor. It’s a simple sketch that reacts to the state of a pushbutton to control the motor’s speed using the TIP120 transistor as a switch.
int buttonPin = 2;       // Button connected to digital pin 2
int motorPin = 9;        // Transistor base connected to digital pin 9

void setup() {
  pinMode(buttonPin, INPUT);       // Initialize button pin as an input
  pinMode(motorPin, OUTPUT);       // Initialize motor pin as an output
}

void loop() {
  // Detect button press
  if (digitalRead(buttonPin) == HIGH) {
    // Increase motor speed progressively
    for (int speedLevel = 0; speedLevel <= 255; speedLevel++) {
      analogWrite(motorPin, speedLevel);
      delay(50);  // Wait a bit between speed increases
    }

    // Decrease motor speed progressively
    for (int speedLevel = 255; speedLevel >= 0; speedLevel--) {
      analogWrite(motorPin, speedLevel);
      delay(50);  // Wait a bit between speed decreases
    }
  }
}
Additional Notes:
- The Arduino can provide a maximum of 40mA at 5V from its pins. As most motors require more current, the TIP120 transistor acts as a digital switch to control the motor with higher electrical requirements.
- Ensure that the diode is placed in the correct orientation to prevent back-emf damaging the transistor when the motor turns off.
If you have any questions, don’t hesitate to reach out in the comments below!
More Arduino Tutorials

Oyvind's Circuit Tips
Get my tips for learning electronics, curious circuits, useful tutorials, hints for choosing components and much more via email.